Enable Control Tower
Enabling Control Tower is the first step in getting started with Gruntwork Account Foundations. It must be completed before infrastructure as code is generated for your infrastructure-live repository.
AWS Control Tower is an AWS service that orchestrates accounts, handling creation, deletion, security policies, and more. It serves as the base layer of Gruntwork Account Foundations.
Prerequisites
In order to enable control tower you will need the resources described in Prerequisites.
Enable AWS Control Tower
This Guide should take about 1hr 15min to complete, most of that time will be spent waiting on Control Tower Operations at the conclusion of the setup flow.
Start Control Tower Setup
Sign in to the AWS management console with your administrator user credentials.
Navigate to the AWS Control Tower console.
Verify that you are working in your desired home Region.
cautionYour home Region is the AWS Region in which you'll run most of your workloads or store most of your data. It cannot be changed after you've set up your AWS Control Tower landing zone. For more information about how to choose a home Region, see Administrative tips for landing zone setup.
Click Set up landing zone.
Review pricing and select Regions
Under Region deny setting select Enabled
- This ensures Control Tower policies and controls are unable to be bypassed by using a non-governed region
Under Select additional Regions for governance select all regions where you plan to operate.
 Region Selections
Click Next to continue
Configure Organizational Units (OUs)
Rename the "Additional OU" to "Pre-prod"
 Configure Organizational Units
Click Next to continue.
Configure shared accounts
Under Logs archive account Enter an email address and rename the
Logs Archiveaccount toLogsUnder Audit account Enter an email address and rename the
Auditaccount toSecuritycautionAccount names cannot be changed after setting up the landing zone. Ensure the accounts are named appropriately.
 Configure Shared Accounts
Click Next to continue
Additional configurations
- Ensure your settings match the screenshot below (These are the defaults)
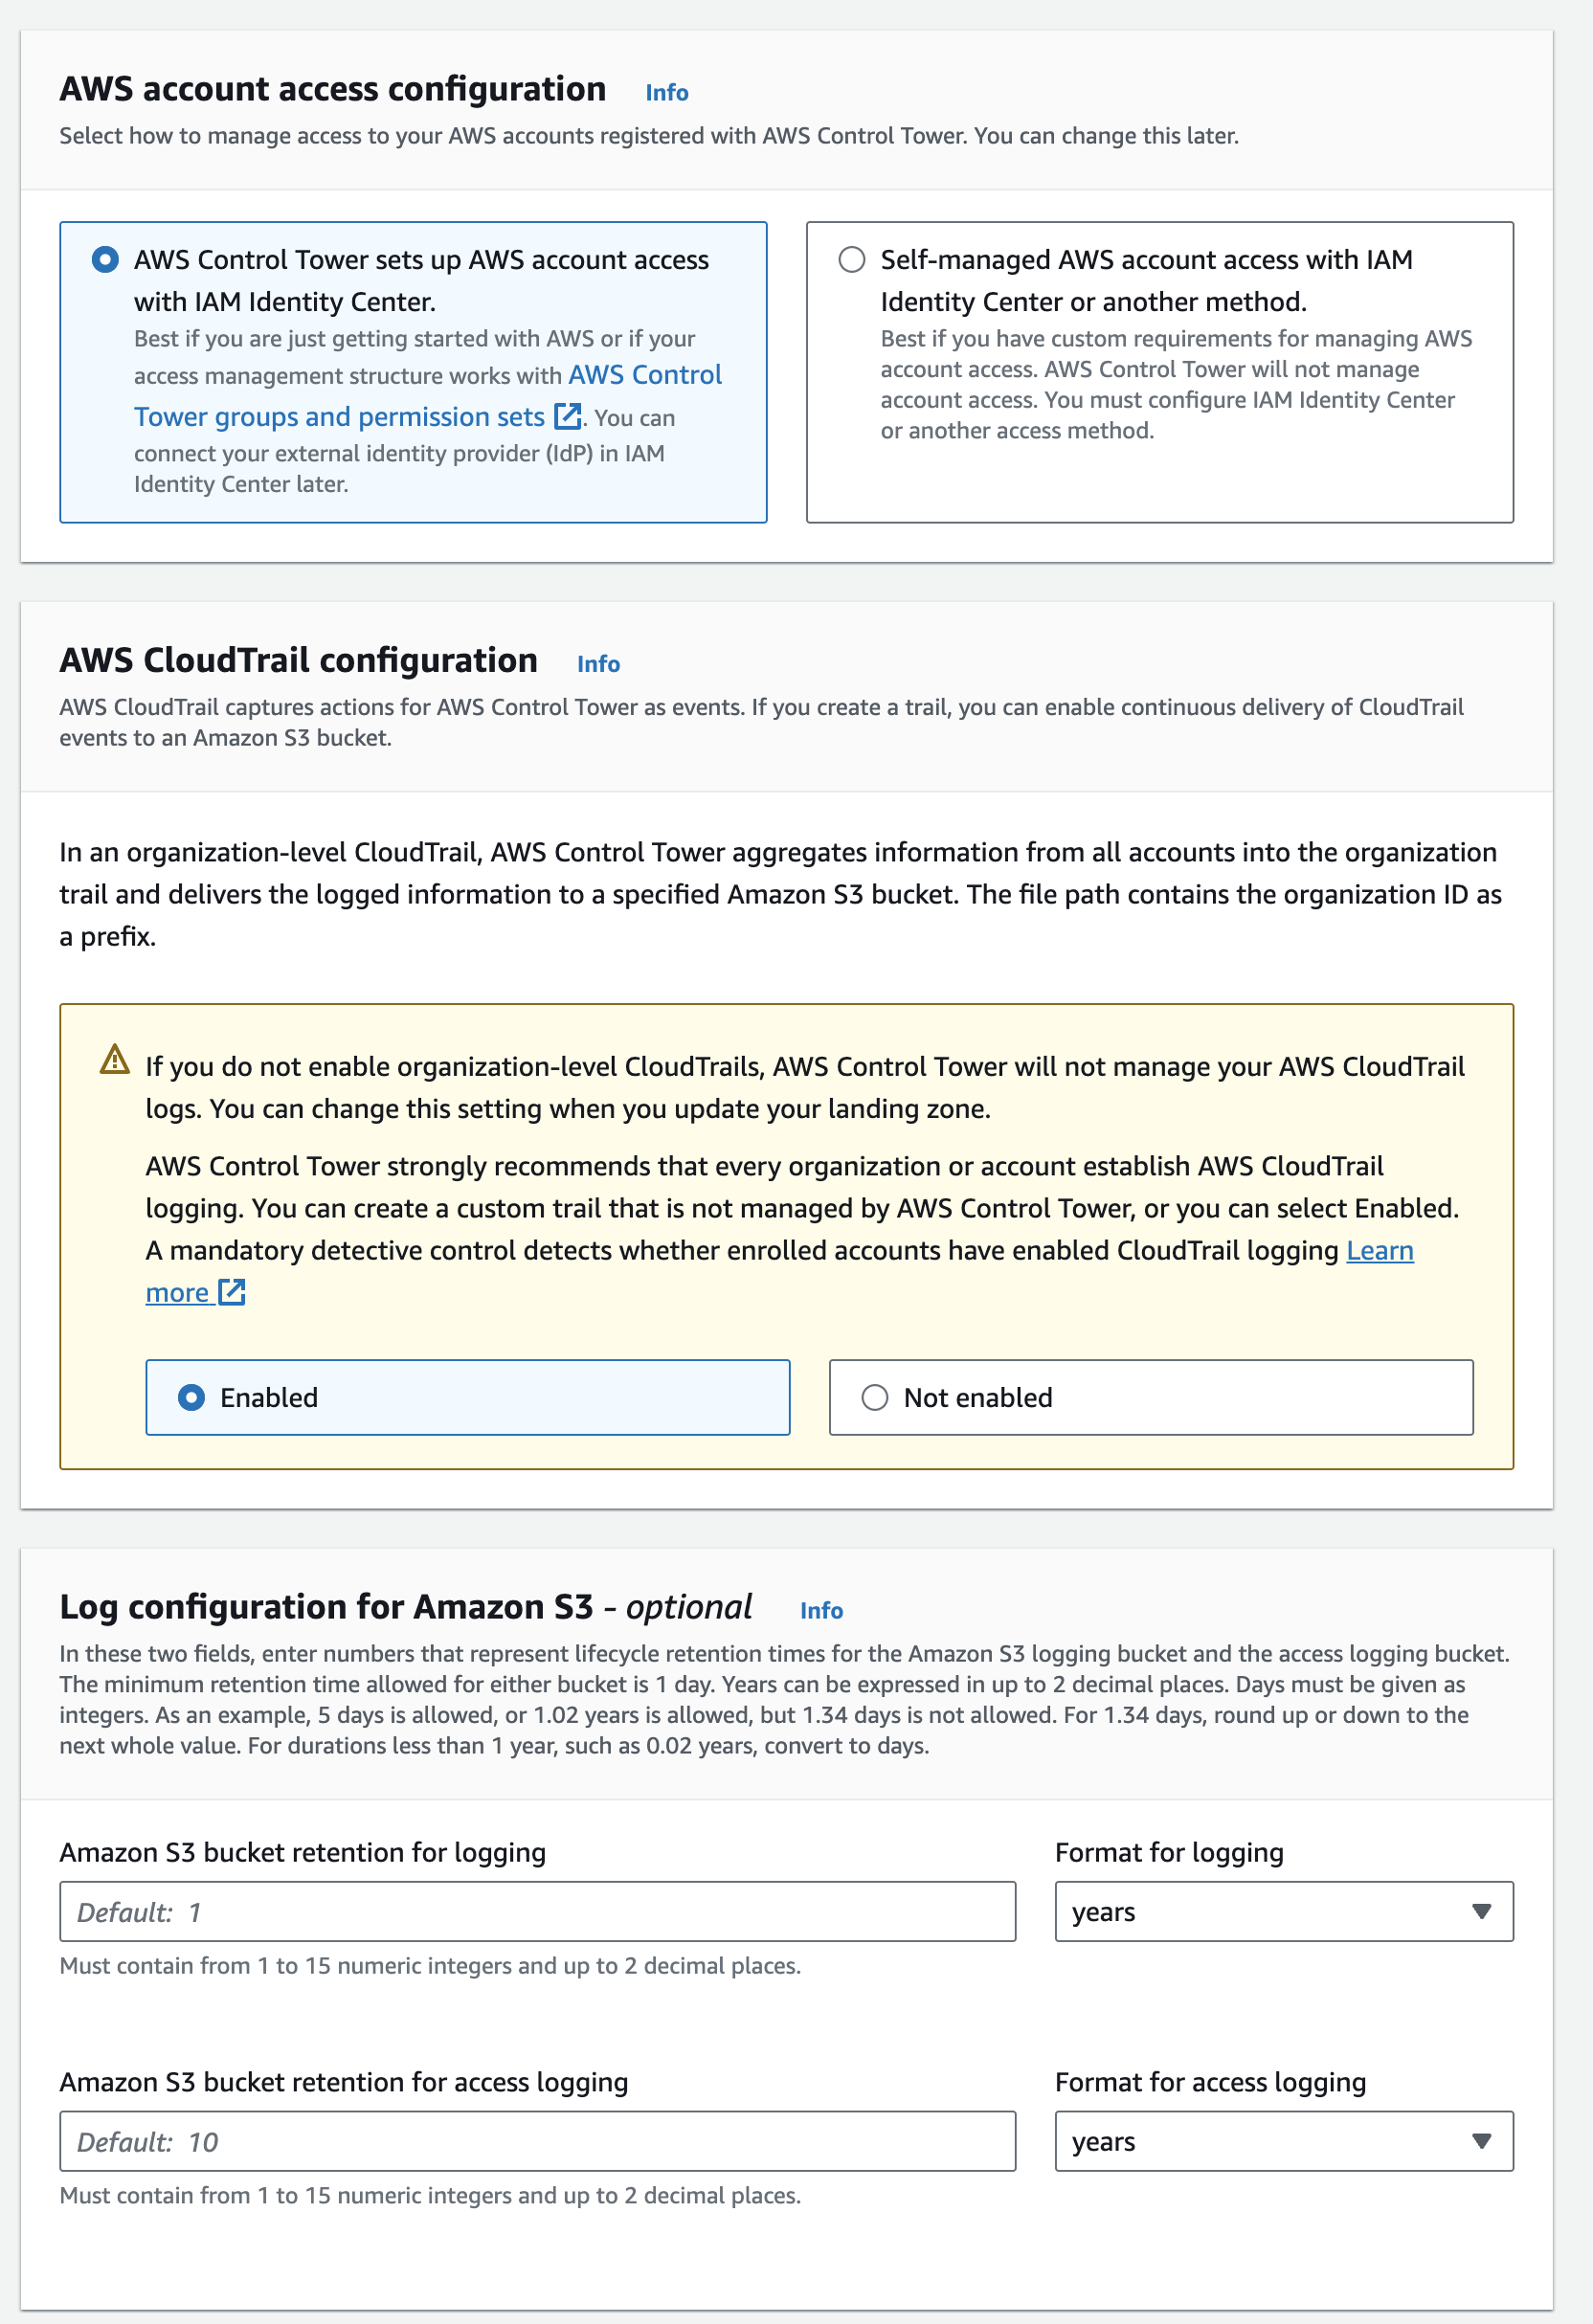
- Under KMS Encryption Check the box for
Enable and customize encryption settings - Select the KMS Key you created following the guide in prerequisites
- Click Next to continue
Finish Control Tower Setup
Control Tower Creation will take around an hour to complete
Review your choices and check the box accepting permissions at the bottom of the screen
Choose Set up landing zone.
Setting up the landing zone can take up to one hour. You will see a notification like the one below with the estimated time it will take for all the resources to be created.
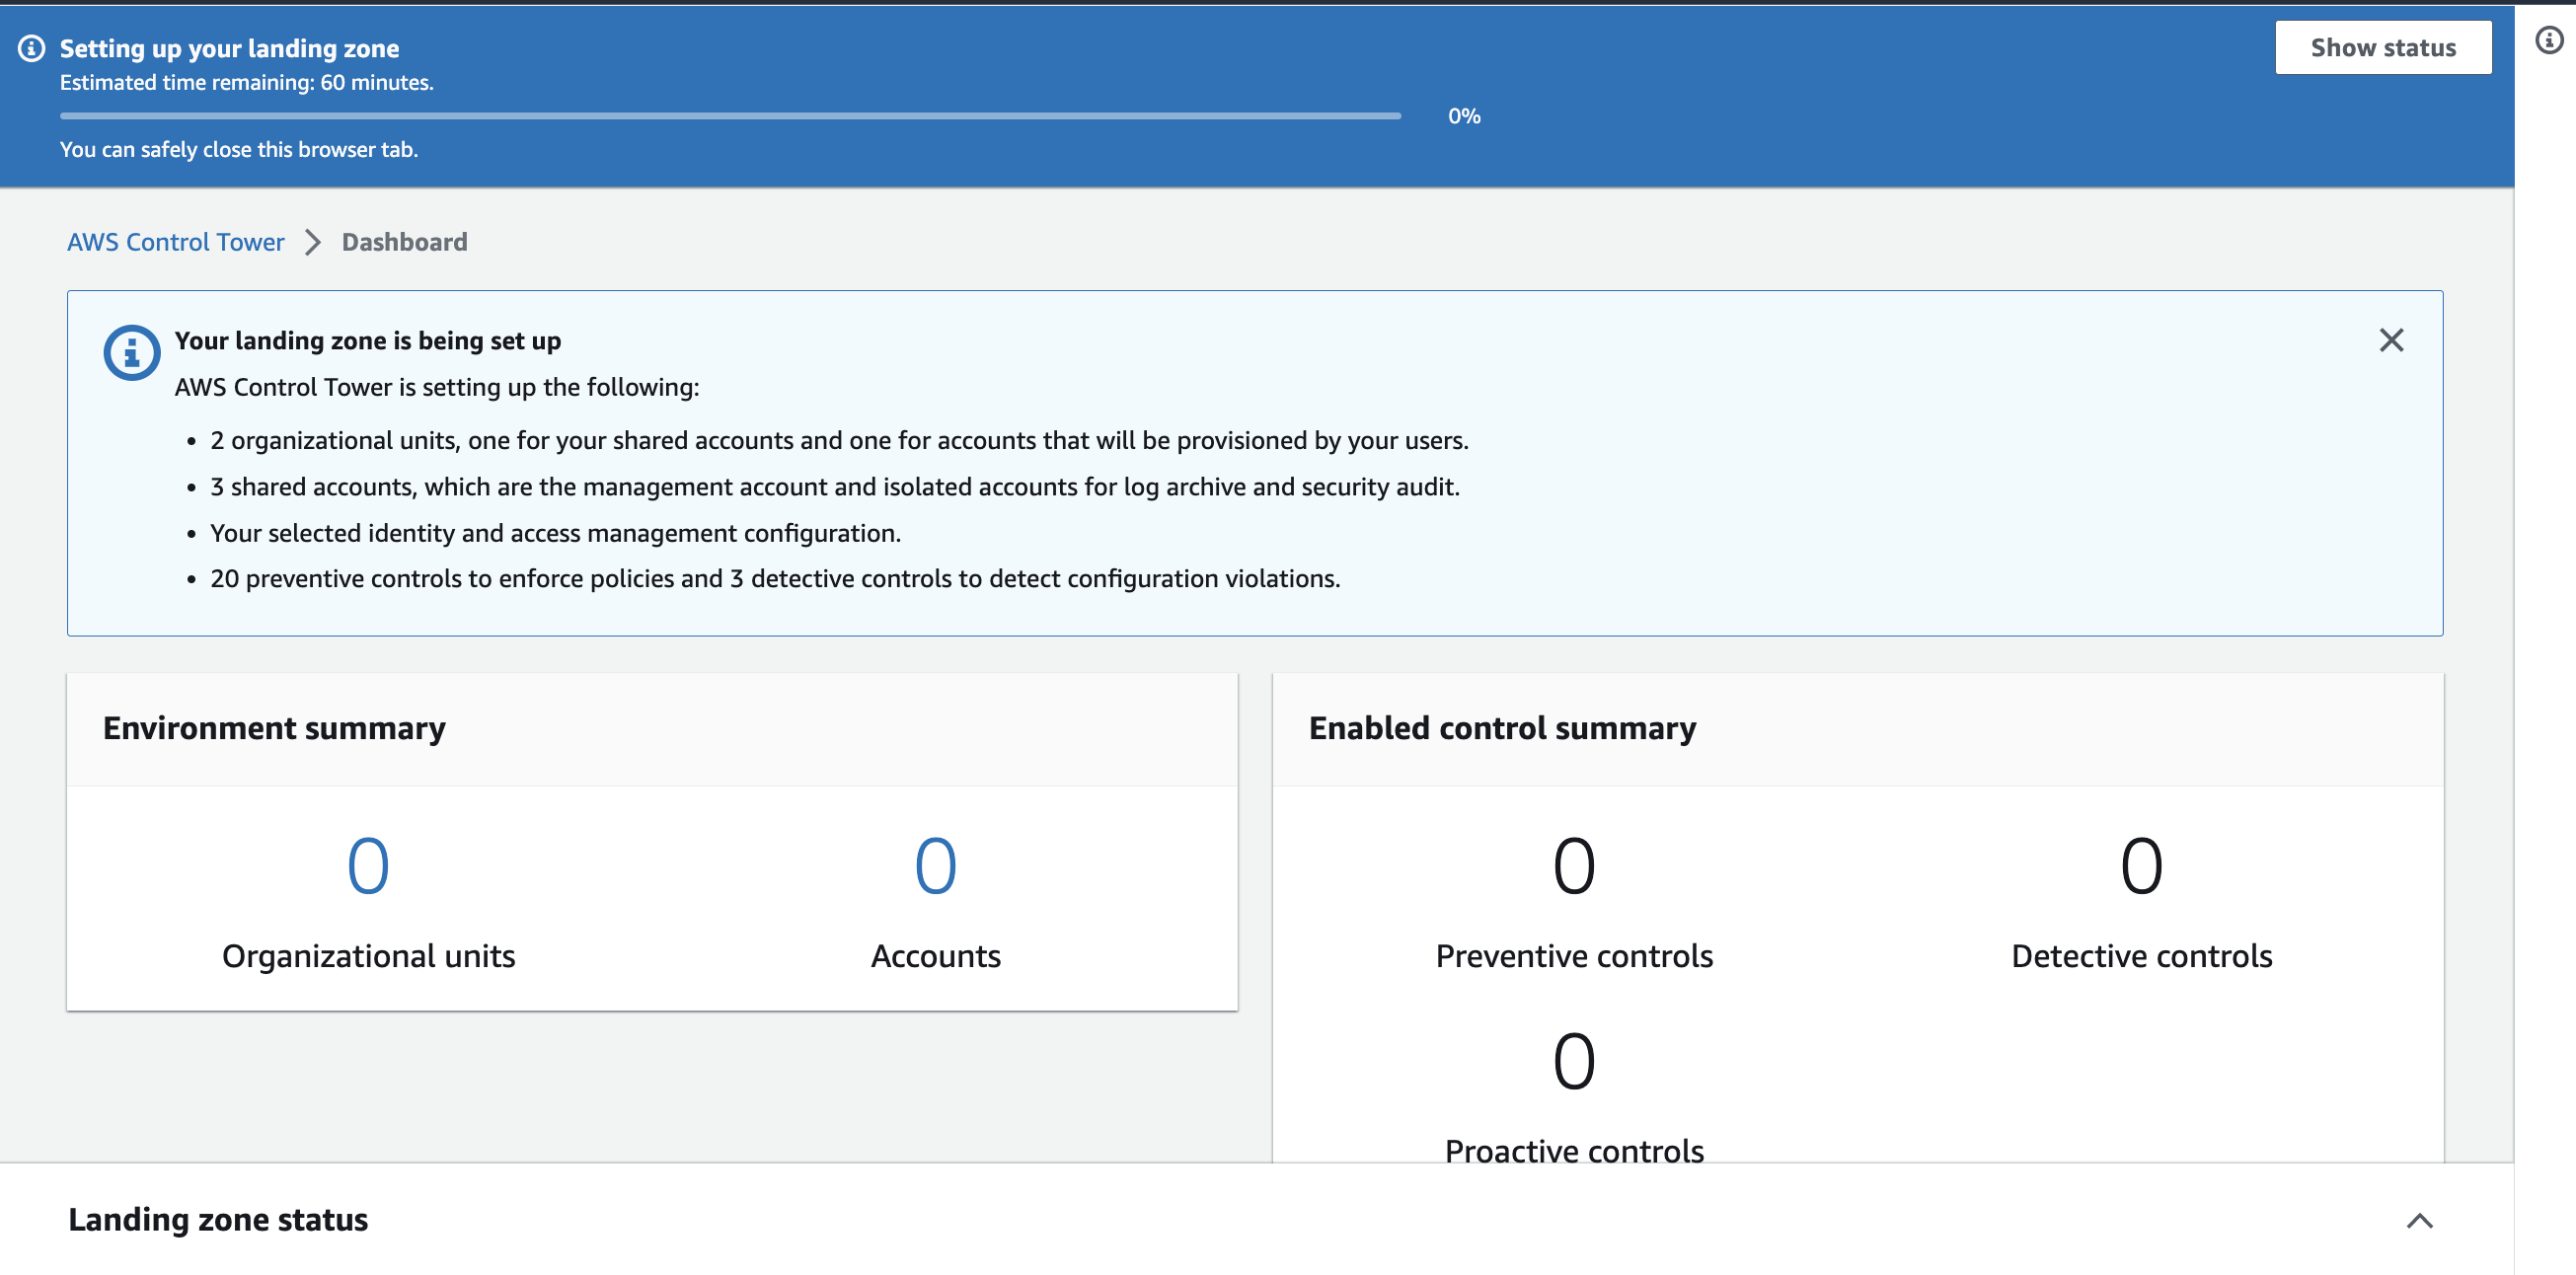 Landing Zone Setup Statustip
You can safely close the browser once you see this.
Emails will be sent out as the accounts are being created and the Root user will be invited to sign in using the AWS IAM Identity Center and designated the Control Tower Admin. Once the invite is accepted; the Root user will be able to access 3 accounts; Root, Logs, and Security using Identity Center's Access Portal URL contained in the email invite.
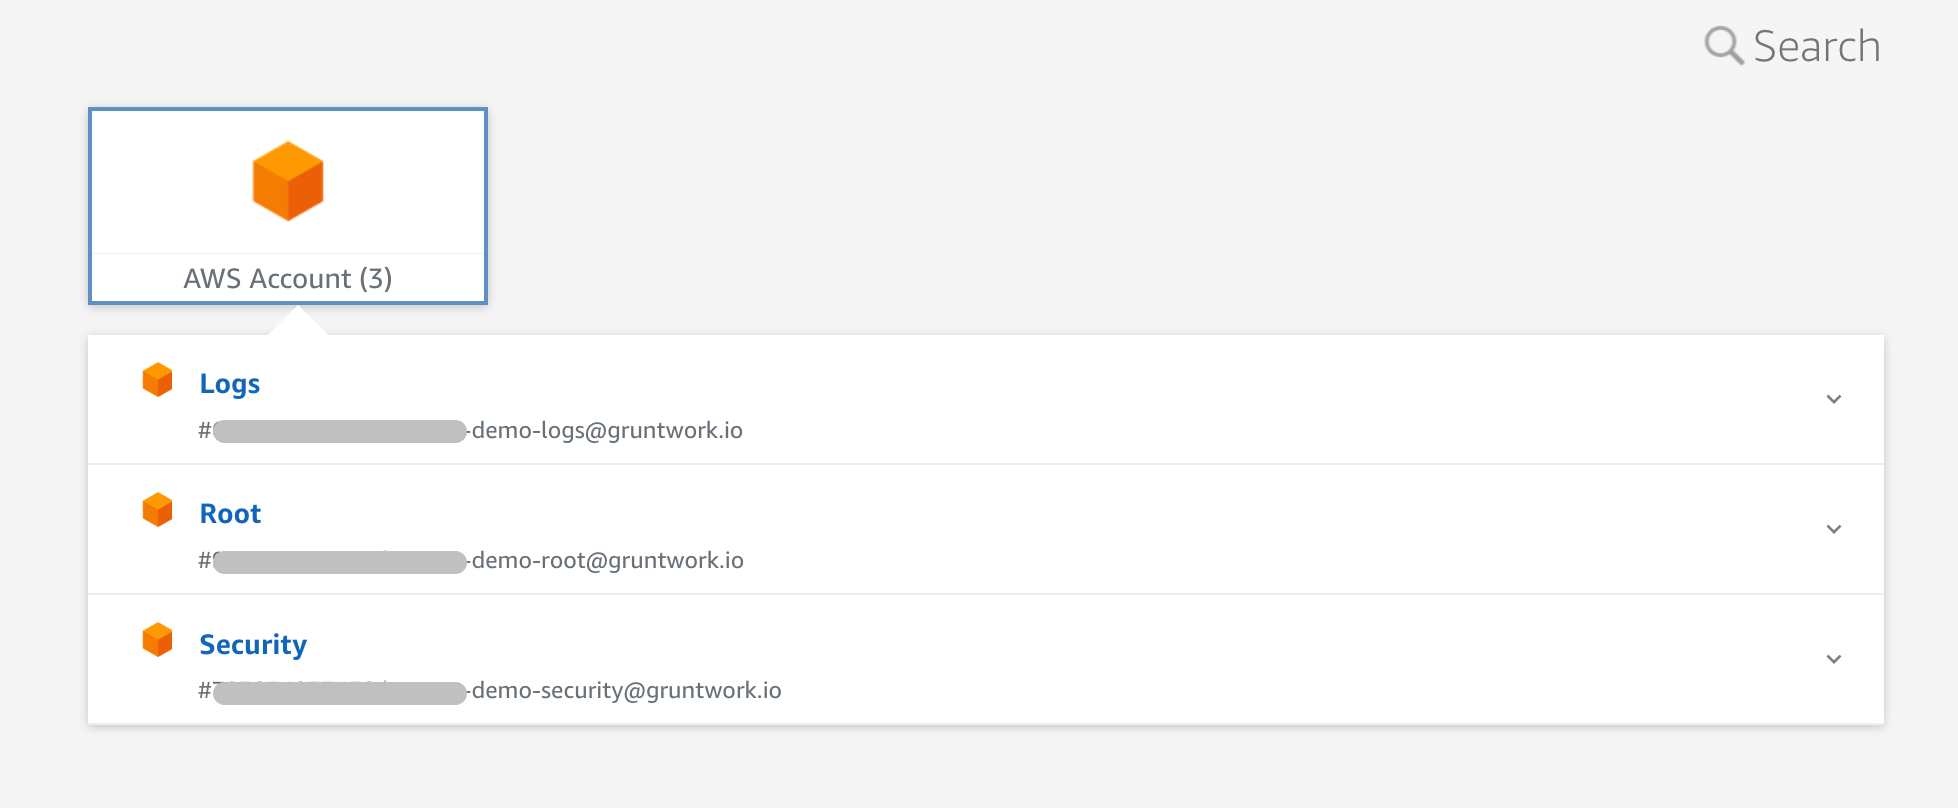 Root User's Access Portal
Initial Configuration
Now that Control Tower is enabled in your root account, there are a few configuration changes that need to be made to prepare the landing zone for Gruntwork Account Foundations.
- Navigate to the AWS Control Tower Organization Dashboard
- Turn off the default VPC created for new accounts. Gruntwork VPCs will be created for each account using terraform.
- Choose Create Resources and select
Create organizational unit. - Create a Prod OU. Select the Root OU as the Parent OU when prompted. Each OU registration takes a couple of minutes.
- Choose Create Resources again and select
Create account - Name the account
Sharedand set the Organizational Unit toProdtipThe shared account is meant to house resources shared with all other accounts. Examples might include KMS Keys, AMIs, or ECR repositories.
- Grant your IAM Identity Center user access to the
Sharedaccount- Navigate to IAM Identity Center, then click AWS accounts under Multi-account permissions in the side menu
- Select the
Sharedaccount from theProdOU dropdown and click Assign users or groups - Switch to the
Userstab, select your management user from the list and click Next - Select
AdministratorAccessfrom the list of Permission Sets, then click Next - Click
Submitto finish assigning access to your user
Next Steps
Control Tower is now configured! Next you should consider:
- Configuring IAM Identity Center for Access Control.
- Configuring any controls or SCPs your organization requires.
- Set up your Gruntwork IaC Foundations